
Teachers will also have the opportunity to design their classrooms.

Resources used: Physical Structure Checklist
Final checklist before the first day of school to make sure all elements are in place for your class to run. These resources can be downloaded from the paid bundle on my website or TpT(coming soon, once the video renders), or you get them for free when you join my mentor membership, "Kolo Says!"- Workstation Planning Tool
- Helps you plan independent stations based on student goals and needs. Throughout the course, you'll get more details about schedules and supplies.
- Floorplan and Layout
- I mean, you wouldn't build a house unless you had your floor plan? Same concept for the classroom. Don't rearrange your room and work up a sweat yet. Visualize the flow and layout before doing the backbreaking work of moving furniture.
- Classroom Zones
- Classroom zones are more for the staff. They help organize staff responsibilities throughout the day. Staff will know what, where and when they'll be doing something. Find more information from Chris Reeves at Autism Classroom Resources.\
- DTI / Fluency Rotation Schedule
- Rotation of students during different DTI or fluency stations.
- Motor Lab Bundle
- Set up your motor lab with structured rotations that are sensory and motor friendly.
All these resources as part of the full bundle. Join my mentorship at "Kolo Says" to get the bundle, resources, and a longer, more in-depth video for this step.
Join the Facebook group for more discussion and support. Receive the weekly emails for reminders in your inbox each week!
Providing clear physical structure is an antecedent-based strategy. It prevents or reduces problem behavior, increases independence, and develops self-esteem!
The structured classroom environment provides visual clarity. The students and staff know where certain activities occur. They are also aware of the expectations of each activity in each area. Physical structure helps students understand that being in a particular area/location can indicate different expectations such as working with others, working independently, taking a break, making transitions, etc... Different areas of physical structure mean different things.
Make sure you have extra space for more fragile or bulky equipment. You may know that some students have assistive technology (switches, devices, and other larger objects). These will also need an easy, go-to storage location. If you read your IEPs, and or completed the profile sheet (prep week), most of this information should be accessible.
When thinking about each area, ask,
- What is to occur in each part of the room?
- How can I arrange furniture (e.g., bookcases, room dividers, office panels, shelving units, file cabinets, tables, rugs, etc.)?
- Where will the location of each area be (how it begins and ends)?
- How will students and staff move and navigate from one zone to another?
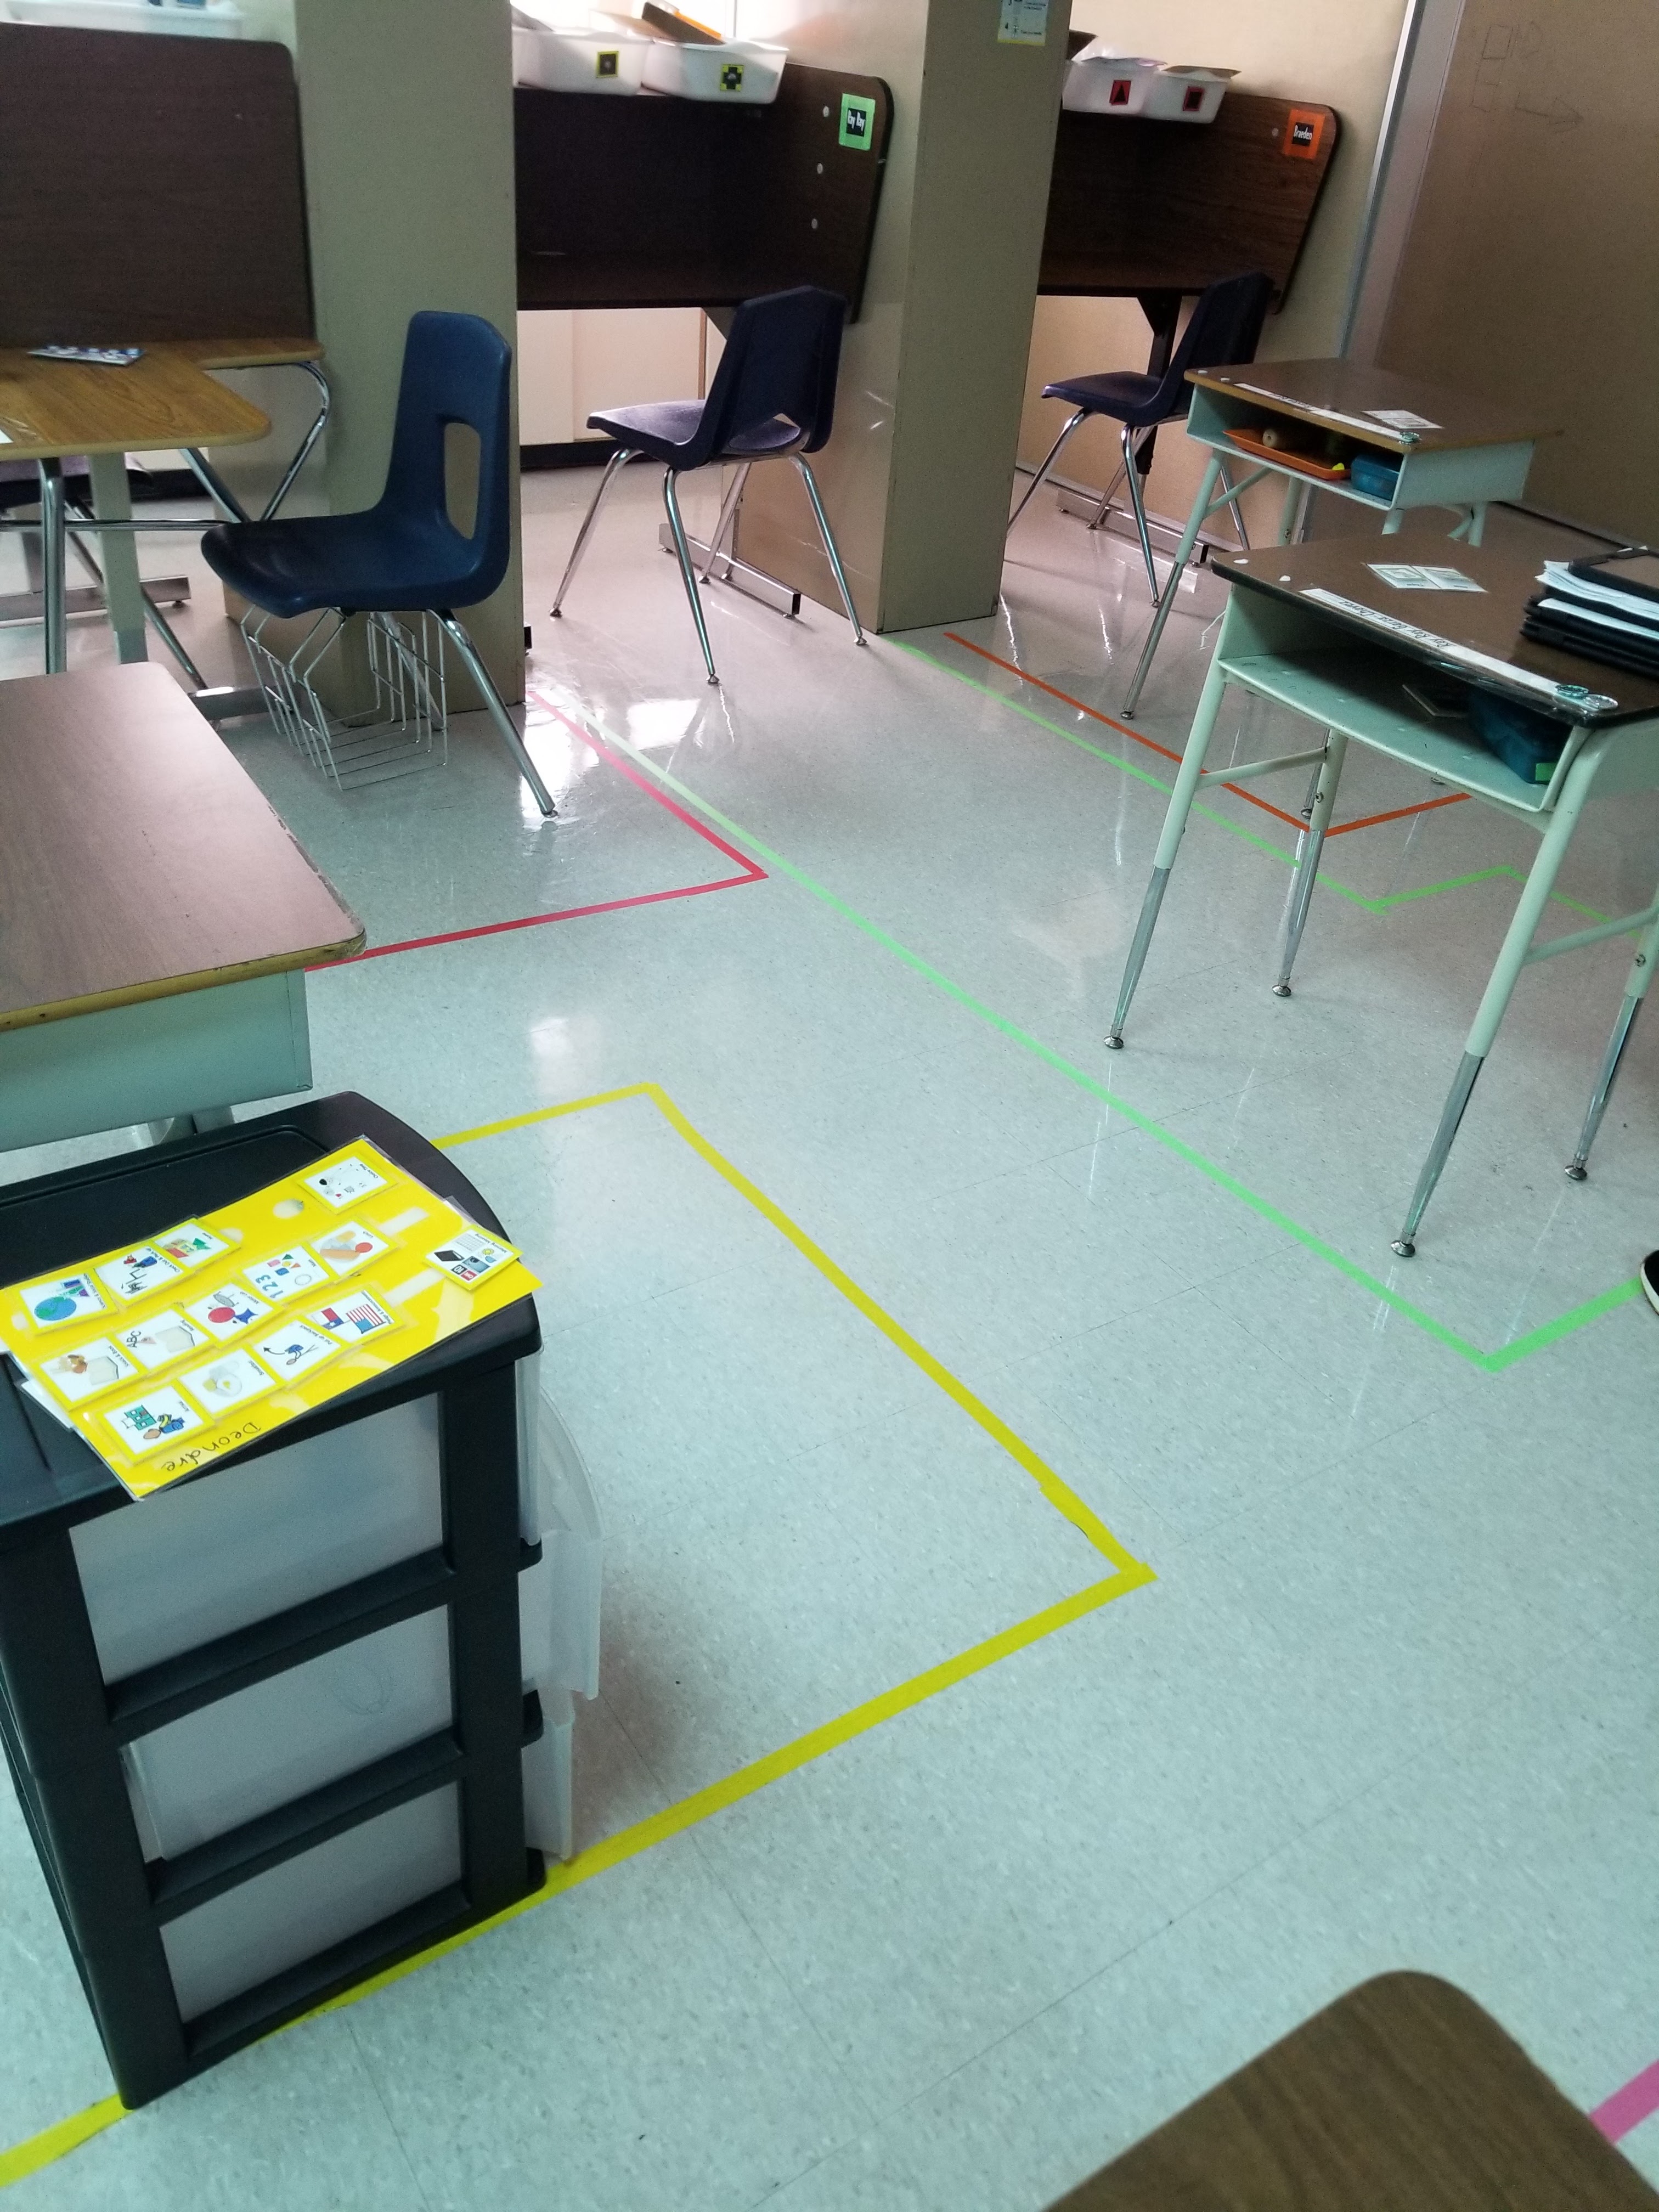
- What materials and furniture do I have available to create structure? (You can use boundary markers such as carpet squares, dividers, or colored floor tape)
 |
| Taco Cabana To-Go visual reminders for staff. |
See, adults use the same visual supports we're giving our kids every day. What type of structure do we see in our daily lives? (e.g. parking lots, signs on highways, reminders on our phones, checklist, etc.). Now your turn, can you Give 3 examples of structure we see in our everyday life?
1.
2.
3.
Let's break down some common areas in a self-contained classroom and see how they can be utilized. In the SCB bundle download, you'll find a brief list of materials that can be used in different stations. Feel free to read over it for an idea of what to work towards. Don't stress yourself out, start with what you have and be creative with it. We're going to go over
- centers/stations,
- large group areas,
- small group areas,
- independent workstations,
- sensory/motor/break, and generalizing around campus.
CENTERS / STATIONS
Remember, each area should serve a purpose.
 |
| Independent silent reading/chill area with News-2-You/Unique Learning bound books. |
Each station should also have a system for keeping data on that student's IEP goals. Then analyze that data weekly or monthly. We'll talk about this in step 7, or you can get a sneak peek at my Google form data-tracking videos on YouTube.
Provide Direct Instruction on the I.E.P. goals and objectives. The classroom teacher provides direct instruction in a small group. The other students (in different stations) practice the skills they've already learned.
Tips to implement centers/stations
Extra reinforcement boxes come in handy during this activity for those students who may need to wait.
Have a box or zippered baggie full at each center, if needed. We’ll talk more in step 2, but we will be creating a schedule for the stations. So, the adults and students will know where they should be.
After 15-20 minutes, the students can rotate to the next center/station. It helps to have the students rotate in the same direction each rotation. Create a structured visual schedule, so they are not confused. We'll talk about schedules in Steps 2 & 3.
LARGE GROUP
Ensure there is enough area for all students to take part in.
Plan for student seating (individual desks, carpet, horseshoe table, large rectangle or circle tables, etc.)
 |
| Independent stations in the back with student desks set up for 'group area,' each color-coded to match students' respective colors. |
Tips to implement a large group
Limit to 20 minutes.
Activities for large group instruction include snacks, welcome and announcements, and some art activities that reinforce a skill already taught.
The more interactive the activity, the more likely the students will be to participate and pay attention.
SMALL GROUP
Focus on Direct Instruction of the I.E.P. goals and objectives.
Provide Direct Instruction on the I.E.P. goals and objectives. The classroom teacher provides direct instruction in a small group. The other students (in different stations) practice the skills they've already learned.
Classroom teachers should be sure to review each child's IEP objectives and data collection system with all classroom staff members to be sure everyone is on the same page.
 |
| small group station 1-3 kids with all materials ready to go. Also, color-coded materials on shelves are hidden to reduce distractions. |
Tips to implement small group
Zipper-type baggies or plastic bins are helpful for storing each child's individual materials and reinforcers. I list different sandwich bag sizes on the back-to-school shopping list and use what the parents donate. The Jumbo size gallon bags are fabulous at holding all the materials for 1 student. Create one labeled baggie for each goal taught. Matching, sorting, identifying, and describing items may work well in this area.
I prefer bags, because if the room gets 'tossed' everything stays in the bag. Unless they shred the bags, but that usually takes a little more effort for students when they're mad.Goals for bathroom or mealtime would not fit into this category, except for role-playing, social narratives, etc.
Limit distractions by selecting work areas with limited visual distractions.
 |
| setting up a small group with an independent workstation behind it and break area on the carpet in back |
INDEPENDENT WORKSTATION
Students will work on structured work tasks by themselves (eventually) from start to finish. Start small and easy and build up to 20-minute time blocks with 6+ tasks by the end of the school year.
At first, they may need much guidance from the teacher or paraprofessional on how to follow a structured work system.
 |
| Simple 1 student, 1-2-3 independent workstation (sorry, missing some tasks as we were getting it ready for school). You can rotate students, and materials, build the 'reset' or switch during the day. |
Creating materials for this area may take some time. The goal is to get the students to work for an extended period of time, not to learn a new skill. Tasks should be related to the student's IEP objectives, or previously mastered IEP goals/objectives. There needs to be clear organization so the student can complete it without help from an adult.
 |
| Independent system with shared resources and workspace |
Tips for the independent station
The TEACCH system is a great way to implement an independent station. Students will learn they CAN do things without an adult and get excited when they don't have to have help from someone or have to have someone by their side to work.
To make independent tasks
Collect various containers or ask parents/family/co-workers to send in containers of various sizes with lids (ask other teachers, use dollar tree or garage sales!) Velcro TM or hot glue works well for keeping materials grounded.
Large storage bins can help to hold each child's work tasks.
Photo or icons of the steps may help to show each student which work task they are to complete. More details will be in Step 3.
Also, use an icon to show "finished" or "reinforcer/choice" when they are done. Start with having the students complete one small task, and then provide them with a reinforcer item/toy. Gradually work up to adding more tasks, therefore increasing the time they are working independently.
 |
Planning it all out!
Let's figure out how to take these concepts from our thoughts to the classroom. If you also need to plan a structured Motor Lab, check out my motor lab bundle. We'll be discussing this more in Step 5 - behavior supports. Reach out to your Occupational Therapist (OT) or Physical Therapist (PT) to support the motor and sensory needs of your students. You can use any combination of the following resources to plan the layout of the class. Don't forget to share it with your staff during your in-service days (hoping you get a decent time to meet with your team). That was a lot of information! I hope it's been helpful to set up the physical structure of your classroom. As you go through the year, if you're having new behaviors and issues, it may be time to tweak the floor plan, zones, or both! You can also move students up or down in independence for their workstations.
- Physical Structure Checklist
- Floorplan and Layout
- Workstation Planning Tool
- Classroom Zones
- Workstation Planning Tool
Now that you have all 5 resources for Step 1, let's start by planning your physical structure.
- Make note of what items and furniture you have to set up the physical structure. Besides what you have, list what you're missing or would like to have. Teachers are always switching furniture! Some districts have a storage location that lets teachers pick and choose furniture for their classes. I love using filing cabinets to make different stations around the room (independent, group, 1:1, break, etc). They're also great because you can store materials and supplies for that station in the drawers.
- Next, use your list of materials to draft a floor plan.
- Zone different areas so staff knows where they will be monitoring or helping students throughout the day. Then start brainstorming the workstations. Keep it simple, get a general idea of the location and we'll hash out the specifics of the station in future steps.
- List the materials (for goals and data collection). Note the visuals (behavior support, communication, and schedule) you have or might want to use in each area. If you don't know these yet, no need to stress, we'll go over more in detail as the course continues!
If you need clarification or help to complete step 1, let me know! What other materials, supplies or furniture do you use to create physical structure in your class? Let me know!
See you in step 2: Master Class Schedule
Image Credit: David Clarke https://unsplash.com/photos/7wTHP1a6vWQ
0 comments